This is where the beginners immediately stop and skip. We are not saying that we are a professional one, However, we but the way we think could give us a chance to work on the program, it was so challenging for us and we didn't consider the amount of bounty as a success result, but a learning and working process. So we specified a time period challenge (200 hours totally) instead of bounty amount. The reason made us write this post, was various techniques we've used during our hunt period, furthermore, we mainly want to share both mindset and technical details for beginners or ever mid-level hunters.
Choose a Program
When it comes to choosing a program, we can assert that it's one of the most challenging phases in hunting. The program should fit with your skills and have the capacity for long-term work. We've roughly spent 10 hours (5 each) to kick off our journey. We totally preferred wide-scoped programs which range from old to modern architectures and programming languages with good payout time and a professional triage team.
The final reason, and actually the main one, was that todayisnew (who doesn't know him?) was listed in first place on the leaderboard. This motivated us, and we asked each other: if he's managed to uncover many vulnerabilities, why can't we? I hope you understand our point from this statement: don't underestimate yourself, as each hunter has a unique mindset when it comes to testing a website.
Reconnaissance
We used various techniques to identify as many assets as possible to work with, as having more space increases the chance of discovering a vulnerability. To mention a few briefly:
- Certificate Search
- Leveraging IP to Asset Discovery
- Using CSP Headers
- Google Dorks
- Using Google Analytics id
- Static and Dynamic DNS Brute force
- OSINT
Let's expand some of the bullets above.
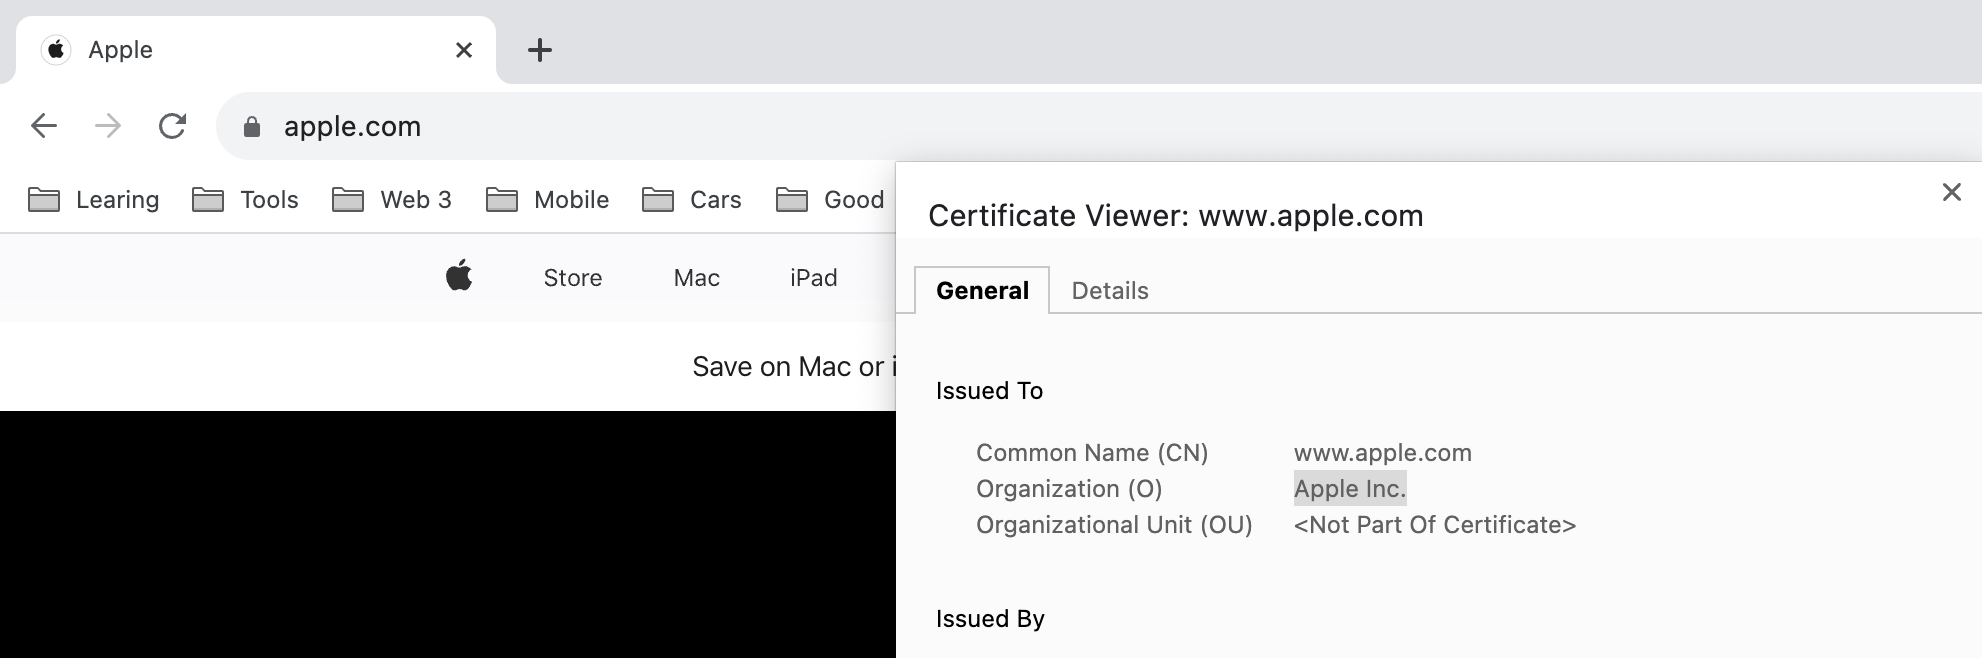
Certificate Search
The common certificate search which everybody do is to search on
Common Name; However, the certificate has different parts such as
Organization field etc. There are some sites searching the Net and
saving certificates, such as shodan or
censys. there may be other alternatives. Since we
cannot name the program as we haven't granted their permission, we make our
example on Apple company:
By using the following command, root domains of Apple company can be enumerated:
curl -s "https://crt.sh/?O=Apple%20Inc.&output=json" | jq -r ".[].common_name" | tr A-Z a-z | unfurl format %r.%t | sort -u | tee apple.cert.txt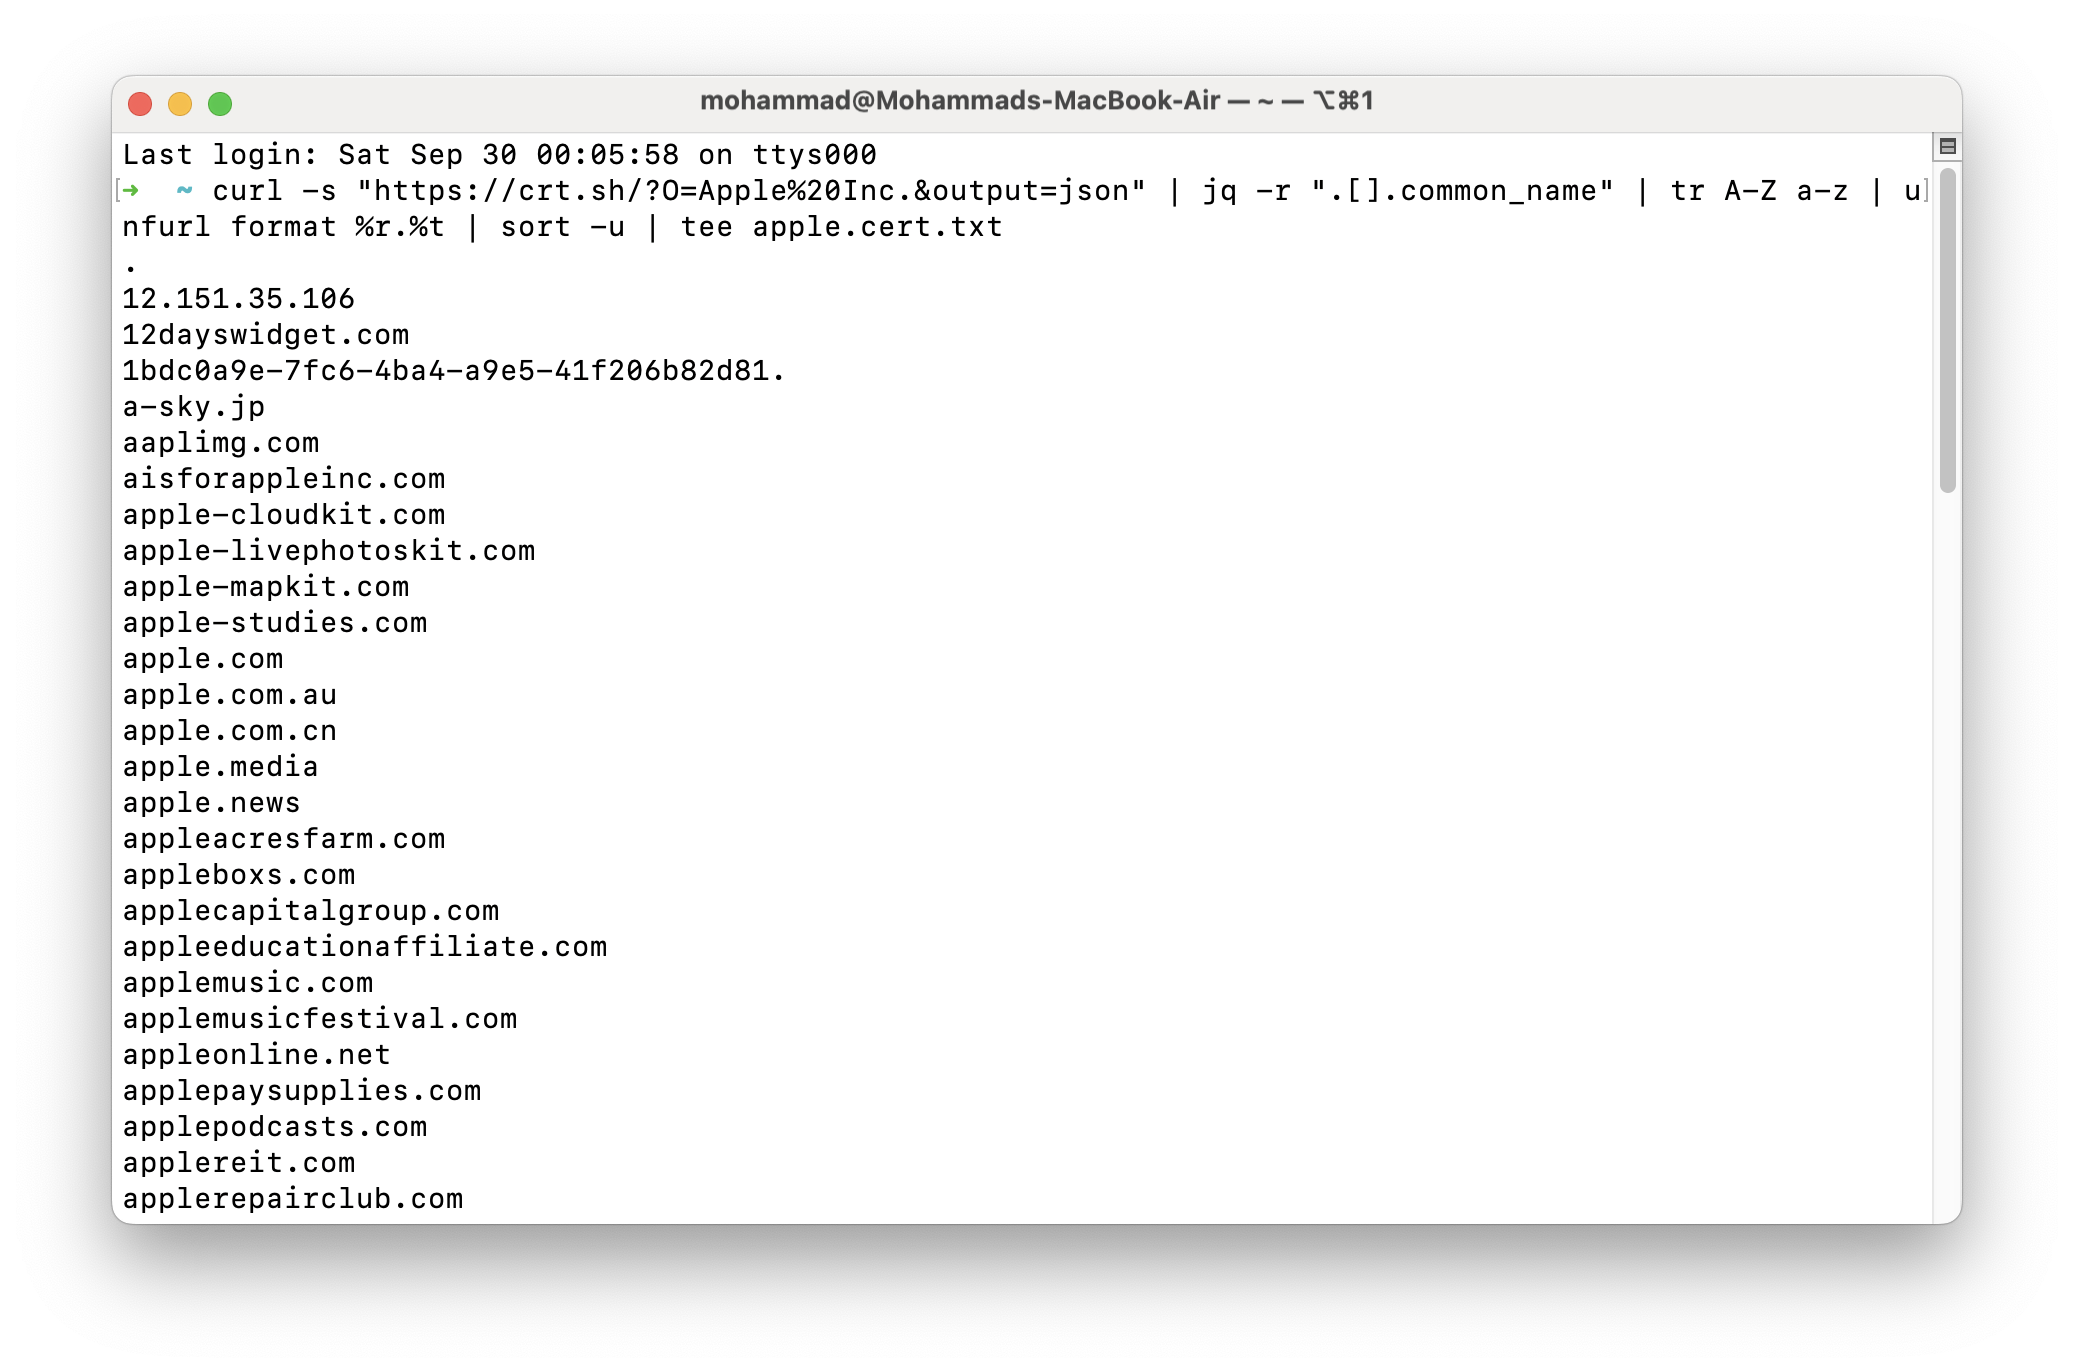
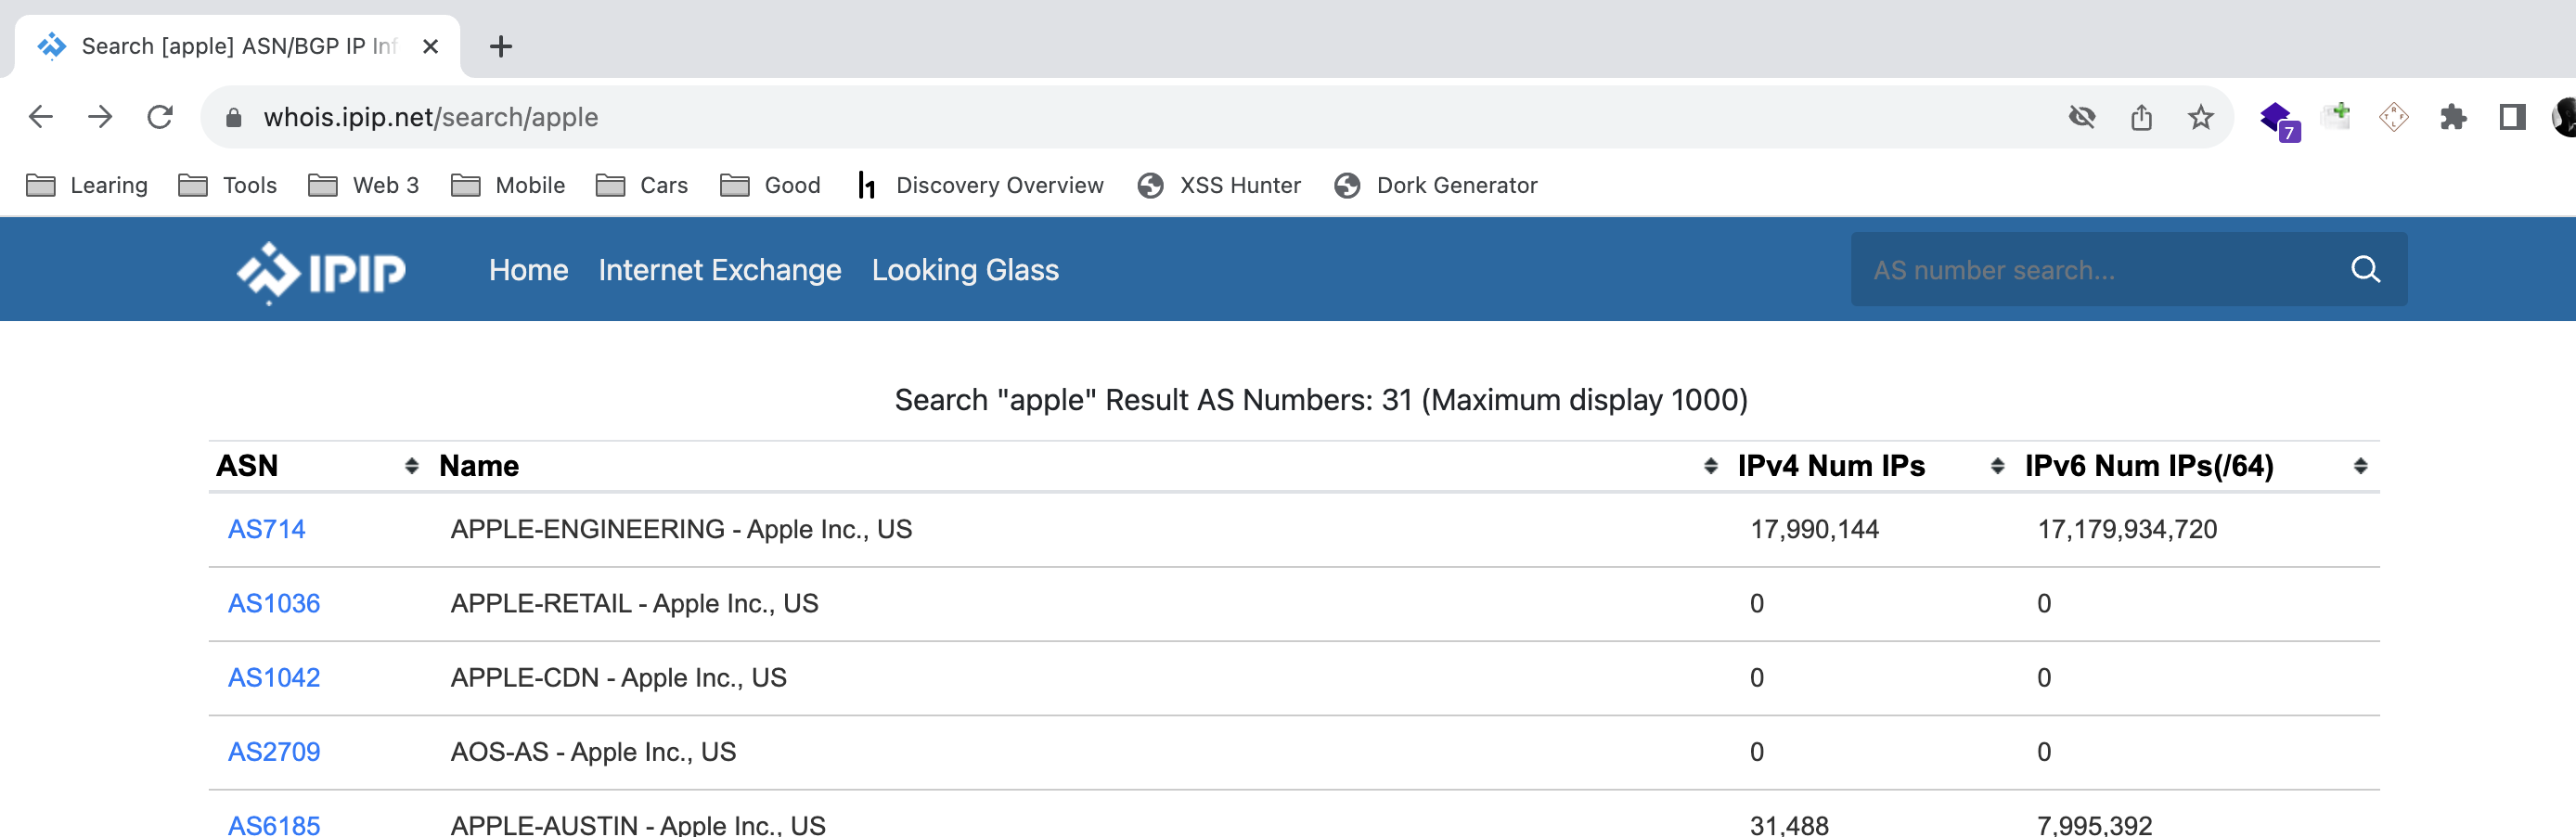
Leveraging IP to Asset Discovery
Each company may own some CIDRs, sometimes it's mostly impossible to find this CIDRs as the name of owner is vague; However, the CDIR with sign of the company (Apple in the ASN name). To find IPs, CIDRs, and ASNs, a lot of ways can be used, with one of my favorite ways being the utilization of ipip.net.
We Scanned all CIDR, ASN, and IPs belonging to the company and extracted
certificate info and we found some domains. By the following command,
alternative names and common names can be found:
echo AS714 | tlsx -san -cn -silent -resp-onlyOSINT
You may already have read about the techniques above on the Net. However, as a
white-hat hacker or hunter, you should continuously think out of the box. In
this phase, after we've finished technical discovery, we turned to OSINT. We
started searching on the Net aimlessly, just reading some news about the
company to figure out something new (we didn't actually know what we were
looking for, just browsing). At this moment, a huge milestone arrived for us.
The company had a news blog, and when I accidentally saw a blog post, I found a
domain like this championscompany.com. I checked it with my recon
results, and it didn't exist in my list of domains.
Afterwards, I checked all 5,000 of the company's blog posts manually and found
60 interesting domains that didn't exist in my recon results.
Vulnerabilities
We found a couple of fascinating (at least for us) security vulnerabilities during our hunt journey. Let's begin with a simple one. To avoid boring the write-up, we write about interesting ones.
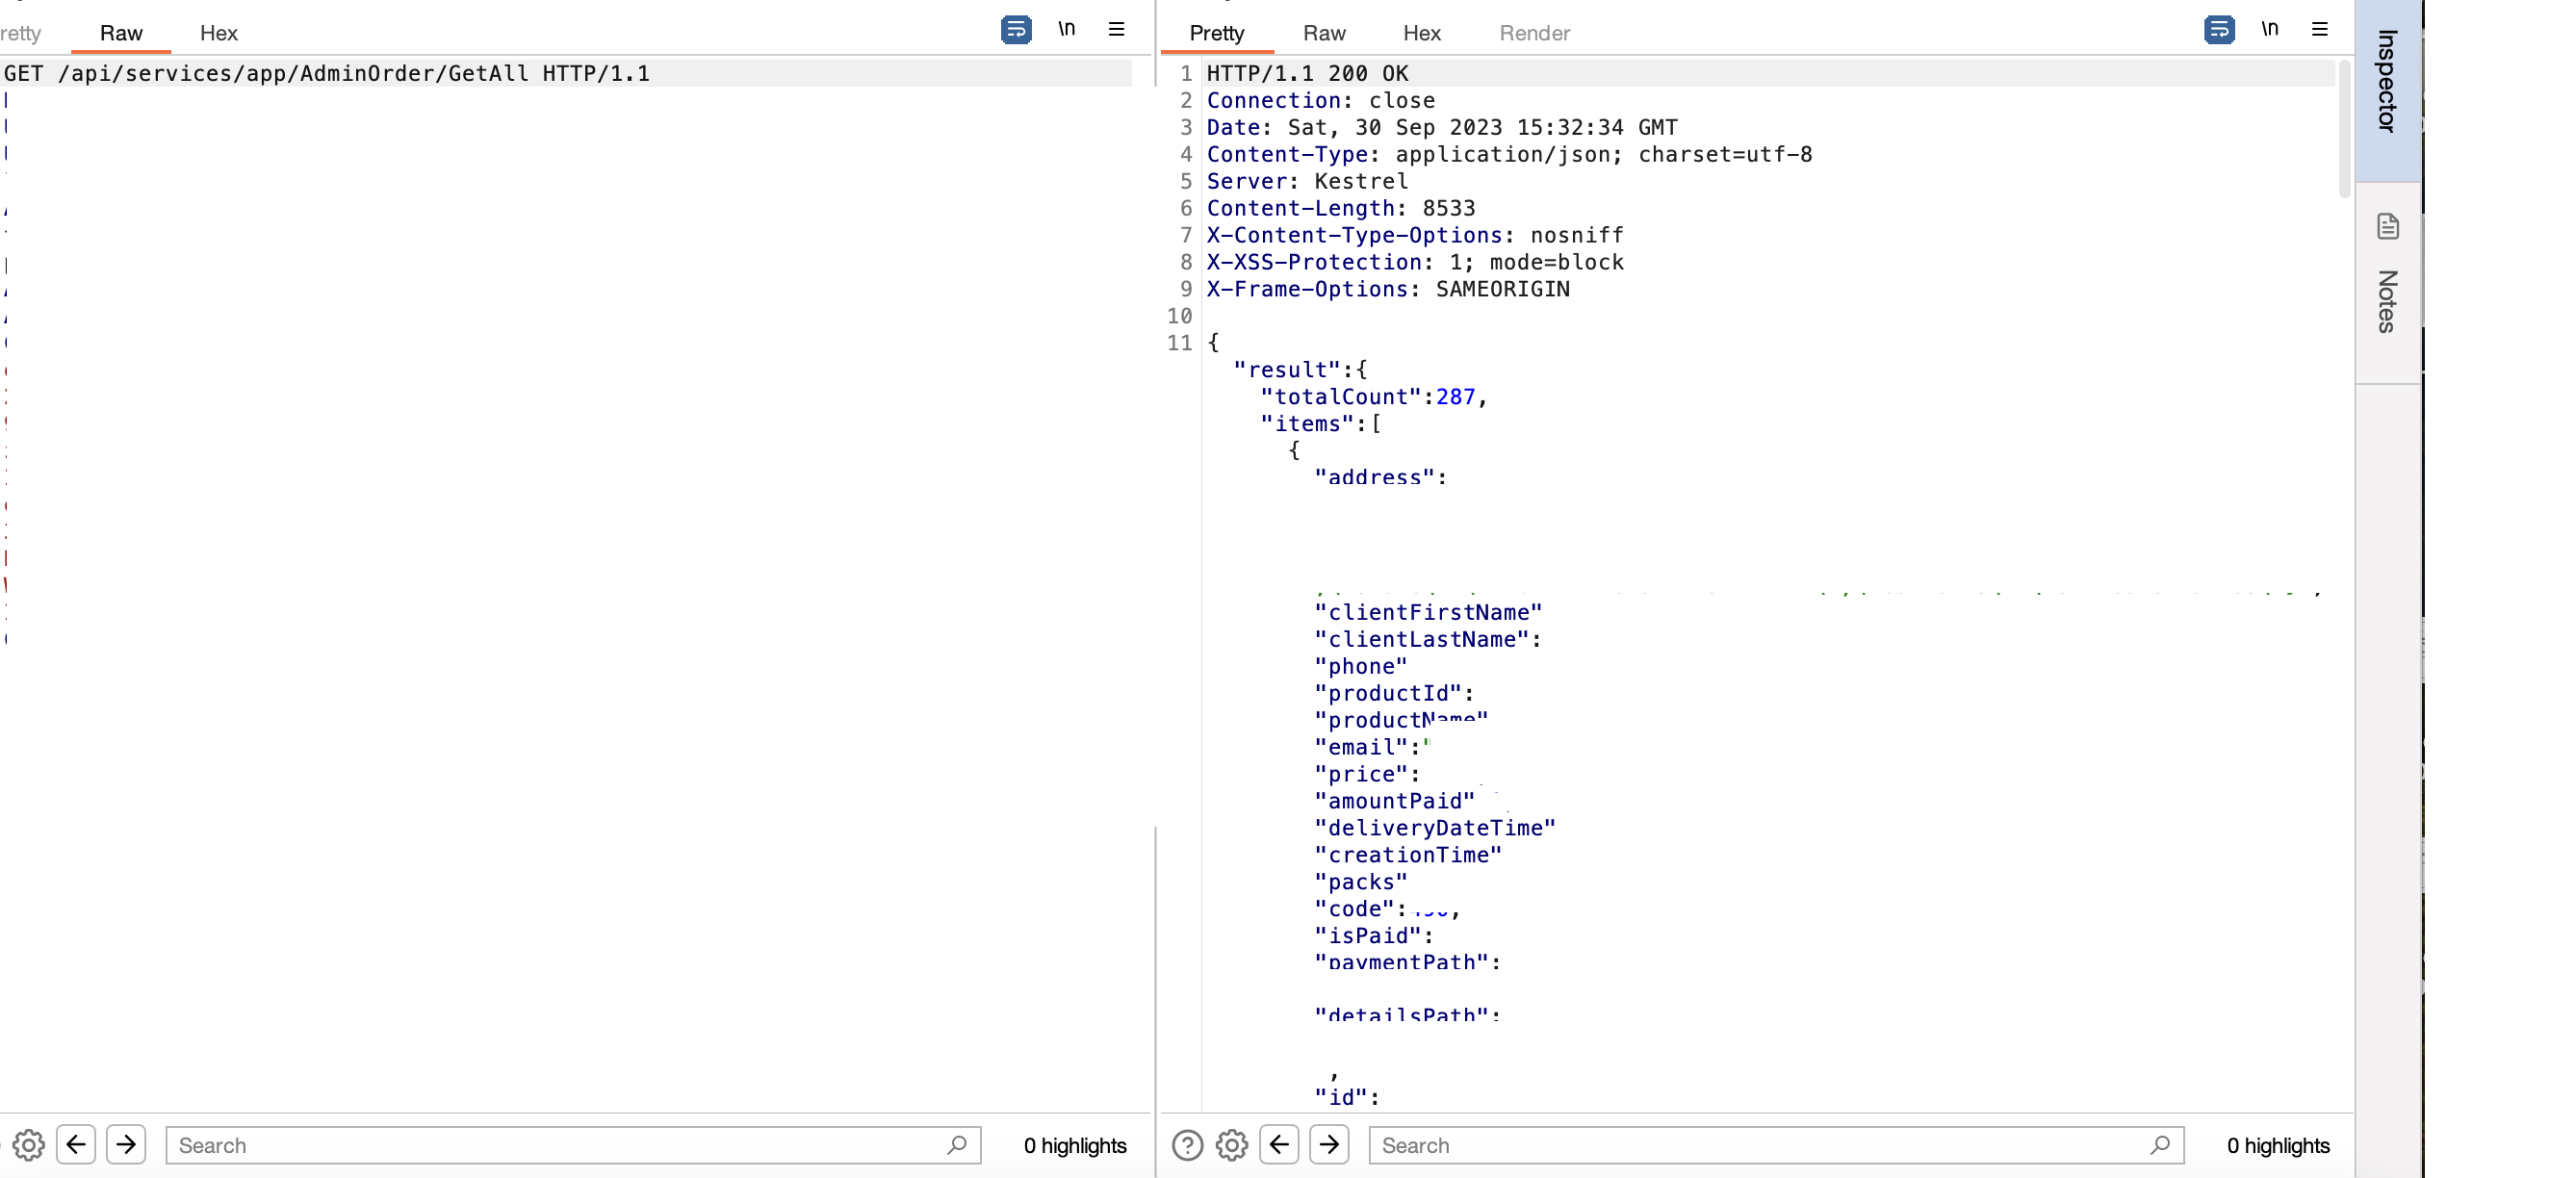
Access all Users' Data by a Swagger / PII leakage
We discovered the test.target.tld subdomain through static DNS
brute force (literally test keyword). We found an authentication-less Swagger
UI giving service on port 5000. There were approximately 100 APIs that
appeared to be protected by authentication; however, we began testing each one
individually (boring but necessary). Surprisingly, we discovered exactly 10
open APIs, and 2 of them were leaking PII, as shown below:
Two SQL Injections
One of the most effective phases of hunting or penetration testing is threat modeling. Once we understand our target's context, we can prepare our test cases and attacking scenarios. Threat modeling is very crucial; you cannot spray or fuzz payloads blindly as you will have no results considering the time you've spent. If the application is not modern (legacy) and has load fields from the database, (in this case, select country) we test time-based payloads on these fields.
We discovered 2 SQLis with 1'XOR(SELECT CASE WHEN(1234=1234) THEN SLEEP(7) ELSE 0 END)XOR'Z payload:


All PII Leakage
We tried to fetch user information by changing the numeric ID in a request,
similar to what many hunters do, but faced a 403 error. We then switched the
request method to PATCH, a tactic some hunters use, but it didn't
work there either. Our key strategy, however, involved adding specific headers.
By including Accept: application/json, we successfully received a
200 OK response. When We browsed the application we saw a request like this:
GET /users/58158 HTTP/2
Host: www.target.com
Cookie: x
Content-Length: 0
Sec-Ch-Ua:
We changed the numeric ID and got 403 error, for bypass, We changed the method to PATCH and added Accept: application/json
PATCH /users/58158 HTTP/2
Host: www.target.com
Cookie: x
Content-Length: 0
Sec-Ch-Ua:
Accept: application/json
The result:

Stored XSS
Anywhere the editor uses text is an interesting environment for testing XSS. However, in most cases, it filters out dangerous tags using regex, so we shouldn't get discouraged here and continue testing. When we browsed the application, we discovered the posts field. In the posts field, you can write post notes like Twitter. But they had CSP, and we must bypass this. We used this payload to bypass CSP:
xss<script/src="https://www.google.com/complete/search?client=chrome&q=hello&callback=alert#1"> "></script>
Access to Employee's Domain Led to Leak All Transactions
During our reconnaissance, we discovered a particularly interesting domain that
included the word demo in its name, such as
companydemonew.com. This domain only offered options to log in or
sign up. To sign up, a company email address, like [email protected],
was required:
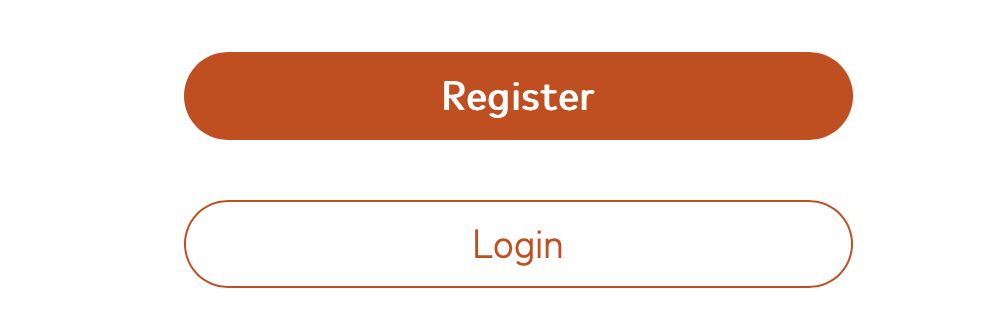
We signed up with [email protected] and we were able to bypass the signup process and get activation email!
Since the domain was not publicly accessible, we anticipated numerous vulnerabilities in post-authentication. Our expectations were met shortly after exploring the site's features. As a result, by simply changing the numeric ID from 35 to 36, we discovered a significant IDOR.
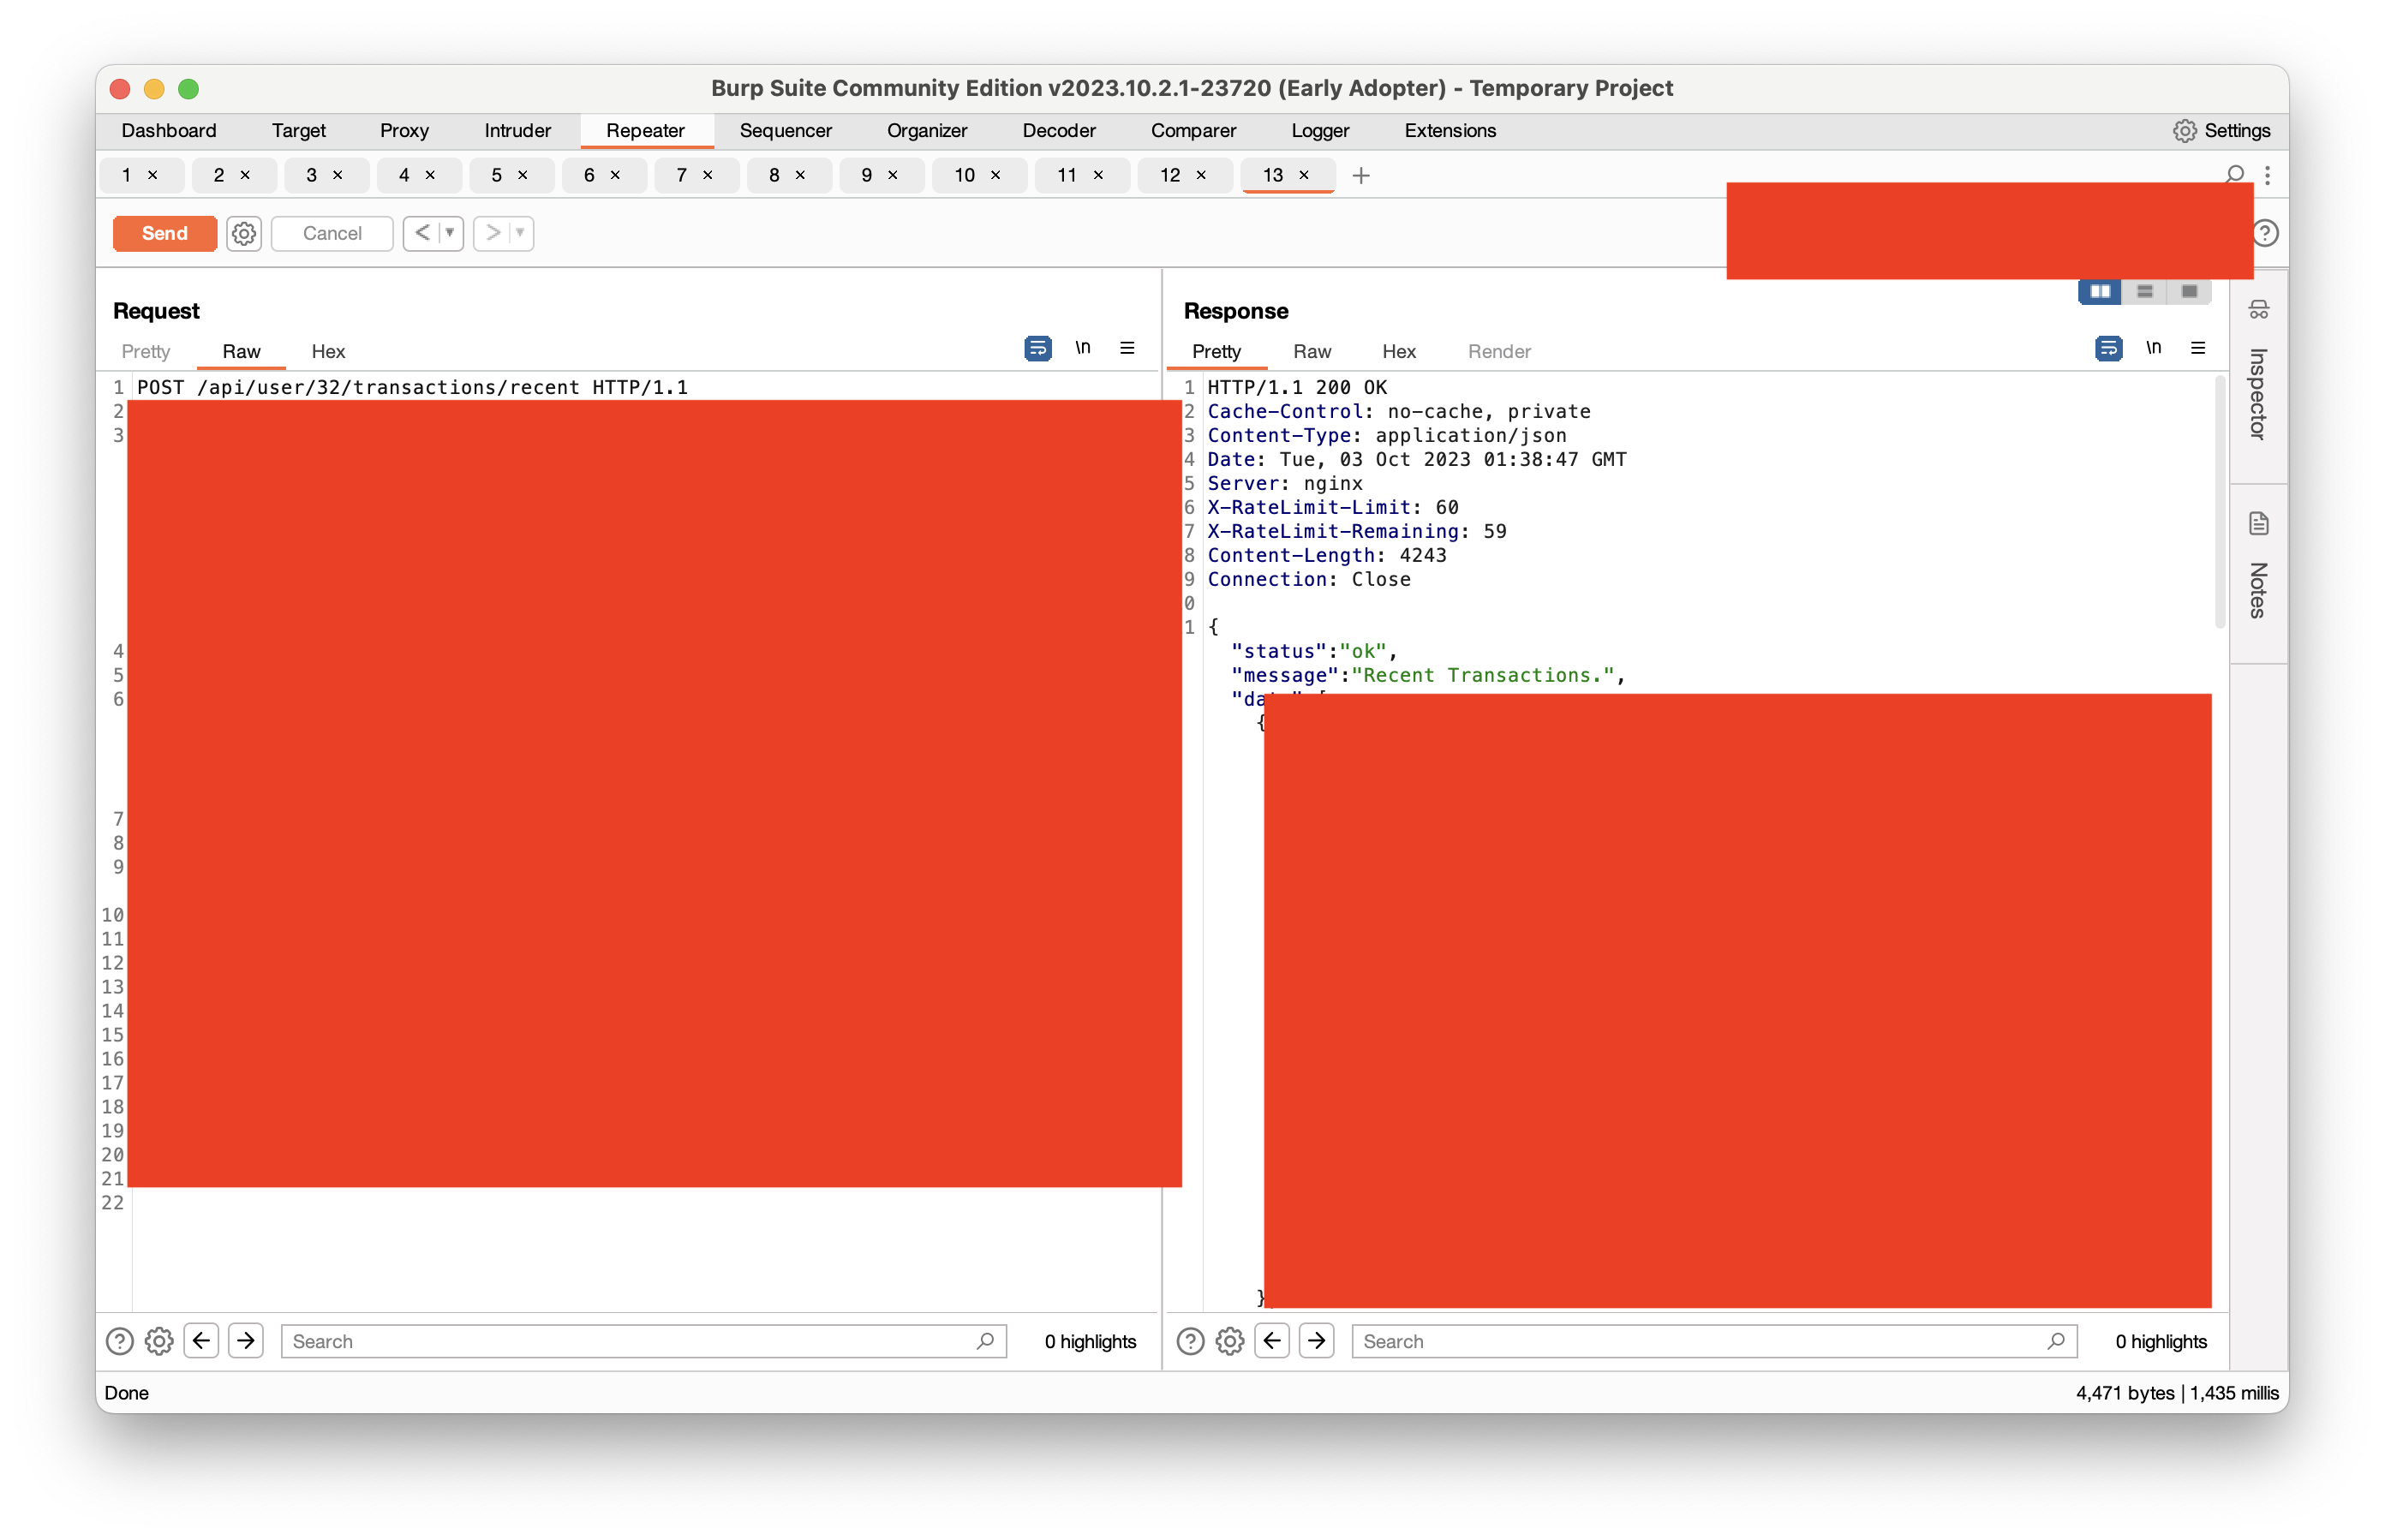
The result:

WPEngine Config File
Using a public wordlist, you can find some bugs, but a custom wordlist can
uncover more. With our private wordlist, we were able to find the
WPEngine config file:
https://target.com/_wpeprivate/config.json
Result:

Other Vulnerabilities
- x2 Database Credentials Leakage
- x1 Account Takeover
- x10 Reflected XSS
- x2 Information Disclosure
- x2 Business Logic
- x2 Subdomain Takeover
Total Hours
We tracked our time daily using the toggl track application to evaluate our progress at the end of the journey. The results are shown in the picture:
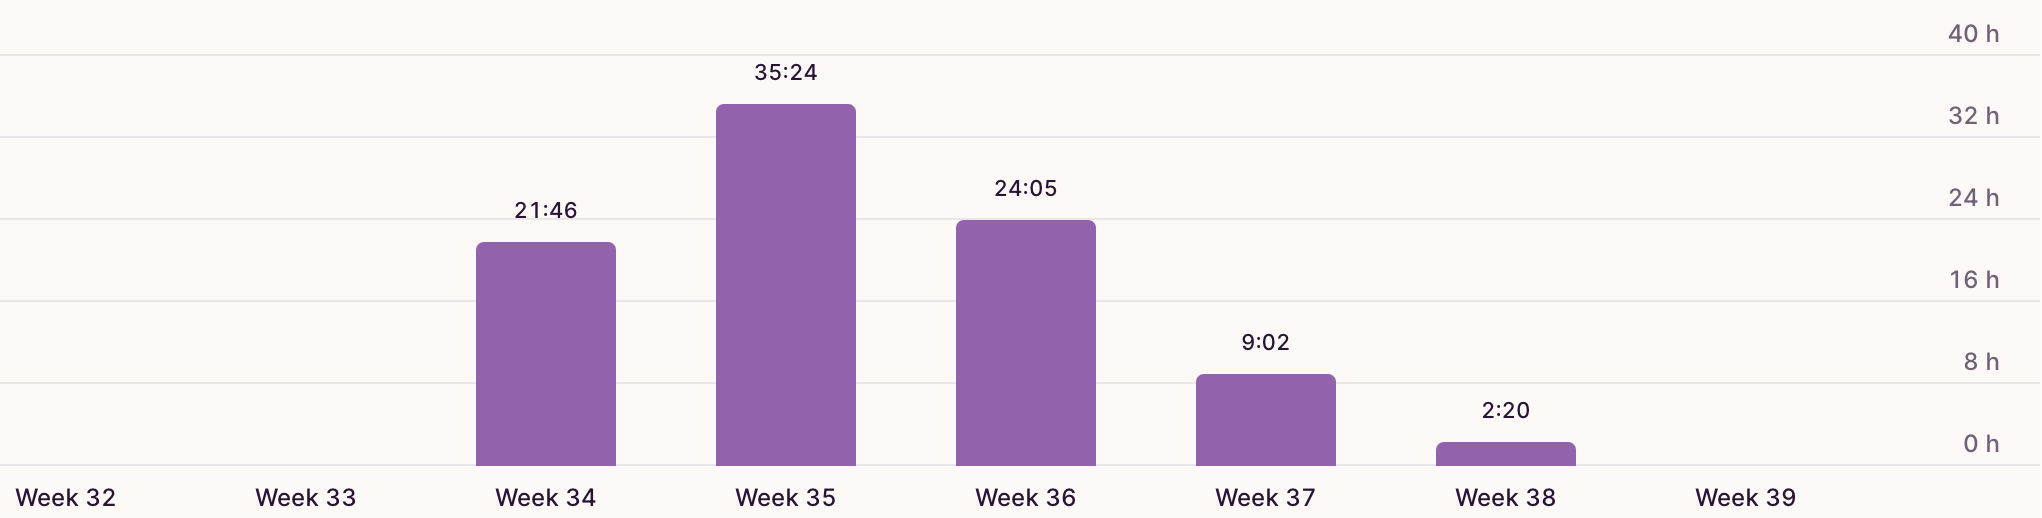
We spent around 200 hours (100 hours per person) on our hunting event.
Total Bounties
After reaching our goal of working together for 200 hours, we paused our hunting and waited for the open reports to be processed. It took almost 5 months to receive bounties for all the reports. In the end, we earned $20,300 from our journey. I hope you find our writeup useful, feel free to leave us comments, thank you.